Empowering Engineering Excellence: Innovate, Elevate, Deliver.

7 Micro Sprinkler Irrigation Tips for Buyers?

Choosing a micro sprinkler system is not just a matter of picking the smallest nozzle. Micro Sprinkler Irrigation can help deliver water to targeted areas, but the right setup depends on crop spacing, soil, water supply, and local conditions. A sprinkler that works well in a narrow greenhouse bed may perform poorly in a windy orchard. Small differences matter.

This guide covers seven practical points buyers should check before ordering: spray radius, flow rate, operating pressure, filtration, layout, materials, and replacement-part availability. Compare product specifications with the water source you actually have, not an ideal setup on paper. A pressure gauge and a simple site sketch can prevent costly mismatches. Ask suppliers for clear performance data, and confirm which filters and fittings the system requires. Not every product listing makes those details easy to find.

Also consider maintenance. Fine outlets can clog when water contains sediment, so filtration and regular inspection deserve attention. There is no single best sprinkler for every farm or garden. That can be frustrating. Budget matters, but choosing only by purchase price may overlook installation time or ongoing upkeep. The tips ahead offer a straightforward way to compare options, while leaving room for a reality check: measure your site and verify the specifications before buying.
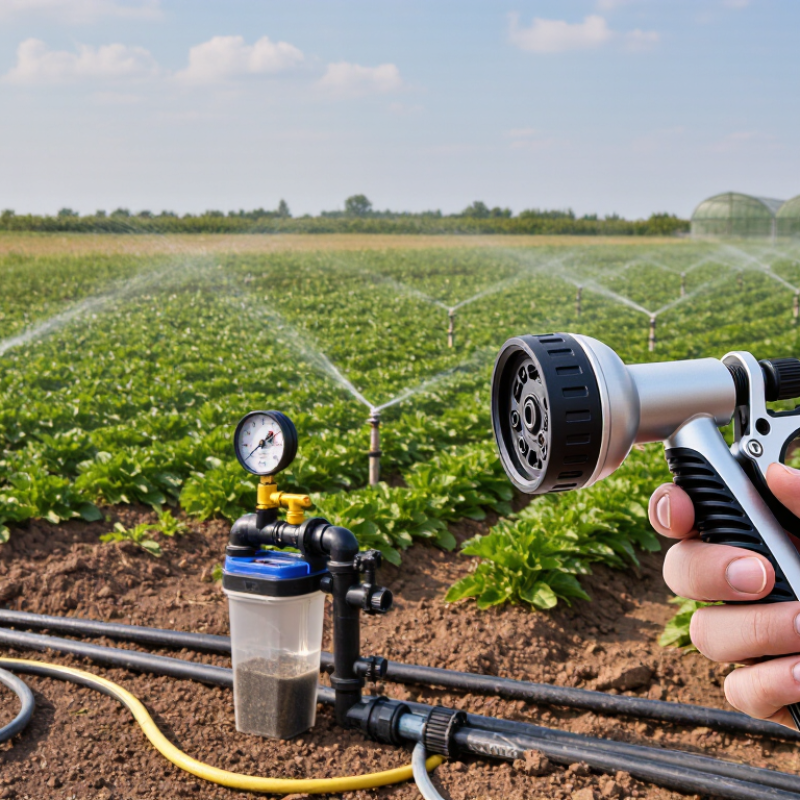
7 Micro Sprinkler Irrigation Tips for Buyers?

Understand How Micro Sprinkler Irrigation Works

Micro sprinkler irrigation sends water through small nozzles, creating a fine spray over a limited area. Unlike drip emitters, which wet narrow points, micro sprinklers cover a broader patch around plants. Their reach depends on nozzle design, water pressure, spacing, and wind. A spray that looks even in still air may drift on a breezy afternoon.

Small details matter. Filters help prevent nozzle blockage, while pressure regulation supports a steadier spray. Place sprinklers so their wetting patterns overlap slightly; dry gaps can form when spacing is too wide. Check the soil after watering, not just the surface. Sandy soil absorbs water quickly, while compacted soil may puddle or send water downhill.

The U.S. Environmental Protection Agency’s WaterSense program reports that outdoor use accounts for more than 30% of household water use on average, and nearly half may be lost to evaporation, wind, or runoff.

Micro sprinklers can help target water, but they do not eliminate those losses. In a real garden, wind exposure and plant growth can change coverage over time, so occasional checks with small catch cups are useful. It is easy to assume the spray is uniform; it often is not.

Assess Your Crops, Soil, and Water Supply

Before choosing a micro sprinkler system, map what you grow and how each crop uses water. Seedlings and shallow-rooted vegetables may need frequent, gentle applications; established shrubs often need wider coverage. Check plant spacing and canopy size, too. A dense row can block spray, leaving dry patches beneath leaves. Small details matter. Place catch cups at several points in the growing area during a short test. Uneven amounts can reveal gaps that a catalog diagram will not show.

Then assess your soil and available water. Sandy soil drains quickly, so shorter irrigation cycles may reduce runoff beyond the root zone. Clay holds water longer, but a fast application can leave puddles. Feel the soil several inches down after watering; the surface alone can mislead. Check your supply’s flow rate and operating pressure, ideally while other water uses are running. A pressure gauge and a timed bucket test provide useful starting measurements. If the water carries sediment, ask about filtration needs before buying, since small outlets can clog. It is tempting to size a system from the garden’s total area, but that can overlook crop differences and pressure losses. Recheck your assumptions in the field. A little extra measuring now may prevent dry corners and wasted water later.

Choose the Right Sprinkler Type and Coverage

Choose a micro sprinkler pattern that matches the shape of your planting area. Full-circle heads work well in open beds, while part-circle or adjustable heads help keep water off paths and walls. Micro-jets can suit closely spaced plants, but check that their spray does not damage delicate leaves. Small seedlings need gentle coverage.

Compare the wetting diameter at your actual operating pressure, not just the maximum listed on a product sheet. Lower pressure or a long supply line can reduce reach. Leave enough overlap between sprinklers to avoid dry gaps, especially near bed edges. Measure first. Place catch cups at several points, run the system, and compare the collected water. Uneven amounts may signal poor spacing, blocked nozzles, or pressure differences. Wind can shift fine spray, so test on a typical watering day. A neat layout on paper may still need adjustment in the garden.

7 Micro-Sprinkler Buying Tips: Choose the Right Type and Coverage

Compare indicative wetted diameters to shortlist sprinkler types for your planting area. Actual coverage varies with nozzle design, operating pressure, installation height, and wind.

Buying tip: Check the product’s flow and coverage specifications at your available pressure, then plan suitable overlap between sprinklers for more even watering.

Compare Materials, Pressure, and Water Efficiency

7 Micro Sprinkler Irrigation Tips for Buyers

Micro sprinklers can suit garden beds, nurseries, and young trees, but the right choice depends on your setup. Compare body materials before comparing price. UV-resistant plastic is light and often practical, while tougher components may handle frequent handling better. Check whether small openings can be cleaned easily; fine mineral deposits can gradually affect spray patterns. A model that looks sturdy may still need regular maintenance.

Tips: Match the sprinkler’s operating pressure to your available water supply. Read the specified pressure range, then check pressure near the irrigation line—not only at the pump. Too little pressure can create weak, uneven coverage; too much may produce excessive mist and water loss. Keep the pressure regulator, filter, and tubing in mind, since each can change flow. Test a few units in the actual bed before buying for a large area.

Water efficiency is more than a low flow rate. Look for a spray pattern that reaches the roots without soaking paths or nearby walls. Place catch cups across the test area and compare collected water after a set run time. Uneven results may point to spacing, pressure, or wind exposure. It is tempting to trust the product specifications alone, but real garden conditions can be less tidy. A small trial may save water—and a frustrating replacement.

Check Installation, Maintenance, and Total Cost

Before buying a micro sprinkler system, check your water pressure and flow rate. A simple pressure gauge can reveal whether the supply matches the system’s requirements. Measure the beds, note plant spacing, and look for windy or shaded areas. Sprinkler spacing that works on paper may leave dry patches beside a fence or under dense leaves. Test a small section before installing the full layout.

Tips: Place filters where they are easy to reach, and flush the lines before connecting the nozzles. Keep spare emitters and connectors on hand. Check for uneven spray after installation. Small clogs matter. During maintenance, inspect tubing for leaks and clean filters according to the supplier’s instructions. I once underestimated how quickly fine debris could collect; the schedule may need adjusting for your water source.

Compare total cost, not just the price of the sprinklers. Include tubing, filters, connectors, pressure regulation, labor, and replacement parts. A system with a low purchase price can cost more if parts are difficult to access or frequent cleaning is needed. Ask how much water each nozzle uses and whether the layout can be expanded later. Estimates are imperfect, so leave room in the budget for fittings or a pressure adjustment discovered during setup.

7 Micro Sprinkler Irrigation Tips for Buyers: Check Installation, Maintenance, and Total Cost
# What to Check Before Buying Installation Considerations Maintenance Total-Cost Impact
1 Match the spray pattern to the crop. Compare the wetted diameter and pattern—such as a full circle, half circle, or strip—with plant spacing and bed layout. Keep spray heads clear of foliage and other obstructions. Adjust edge heads so water is directed into the growing area rather than onto paths or walls. Check that heads have not shifted, become blocked, or been covered as plants grow. Correct patterns can reduce overspray and avoid buying more heads than the layout requires.
2 Confirm flow rate and operating pressure. Use the flow and pressure specifications for the selected nozzle; micro-sprinkler requirements vary by model. Measure pressure while the system is running. Use a suitable regulator if needed, and verify that the supply can deliver the combined flow of the zone. Recheck pressure if spray distance or coverage changes. Look for leaks or partially closed valves that can affect performance. Correct sizing can prevent uneven watering, unnecessary pumping, and later changes to the pump or pipework.
3 Plan spacing for overlapping coverage. Compare the specified wetted diameter with proposed head spacing; wind and site conditions can reduce effective coverage. Lay out the system on a plan before installing pipe. Test coverage with the heads running and adjust spacing where dry gaps appear. Inspect coverage at the edges of each zone, especially after moving stakes or replacing emitters. Good spacing balances the number of heads and pipe needed against the risk of dry spots and repeated watering.
4 Include filtration in the design. Select filtration based on water quality and the irrigation equipment’s requirements; no single filter rating suits every system. Install the filter where it is accessible for cleaning and follow the system design for its position relative to valves and regulators. Inspect and clean the filter as its manufacturer recommends, and more often if the water contains visible sediment or algae. A suitable filter adds an upfront cost but can reduce clogging, repairs, and premature emitter replacement.
5 Choose pipe and fittings for the site. Check pipe diameter, pressure rating, connection compatibility, and suitability for outdoor exposure. Use a layout that limits sharp bends and makes flushing possible. Secure tubing so heads stay in position during operation. Check joints and exposed tubing for leaks, cracks, and damage from tools, animals, or foot traffic. Include mainline, lateral tubing, connectors, stakes, valves, and any required regulator—not just the sprinkler heads—in the materials budget.
6 Consider wind, slope, and water source. Fine spray can drift in wind, while slopes and pressure differences can affect how evenly water is applied. Where practical, irrigate when wind is low. On sloping or uneven sites, check the design for pressure variation and water movement across the soil. Observe the system under typical operating conditions and adjust run times or zones if watering is uneven. Site conditions may require more zones, additional controls, or a different spray pattern, affecting installation and operating costs.
7 Compare the full lifecycle cost. Consider equipment, installation labor, water use, energy for pumping, replacement parts, and routine maintenance. Plan accessible shutoff valves and flush points. Divide the system into zones if the water supply cannot serve all heads at once. Check heads and filters regularly, flush lines as appropriate, and drain or protect components where freezing is a risk. Request an itemized estimate and compare expected service needs—not only the purchase price of the sprinklers.
Download
Brochure